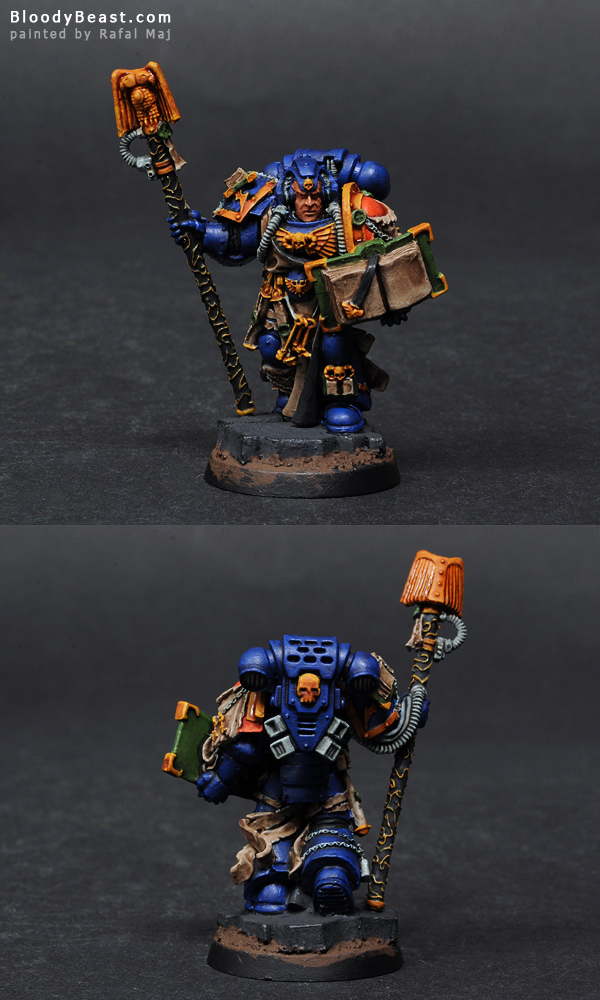
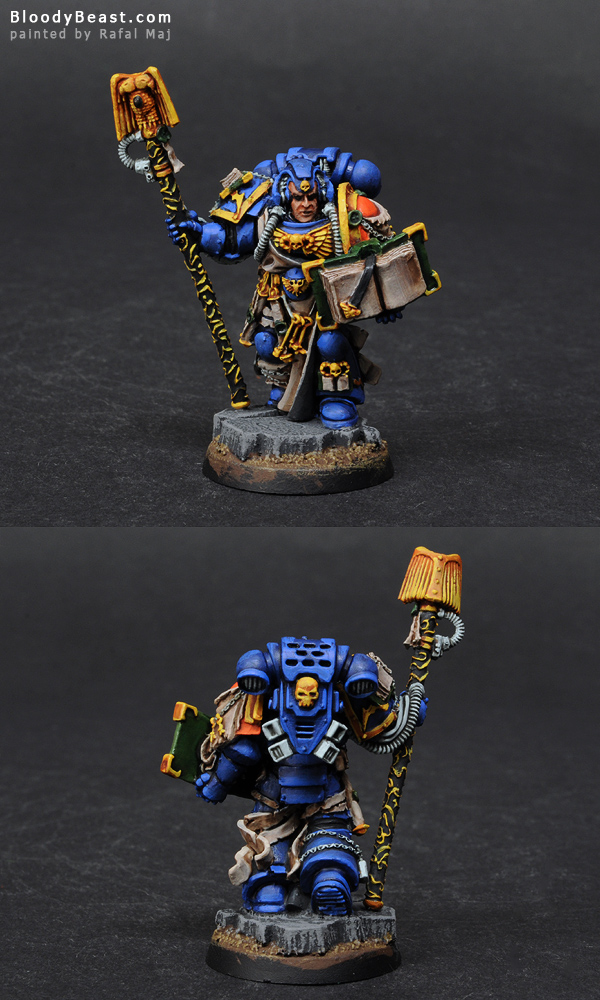
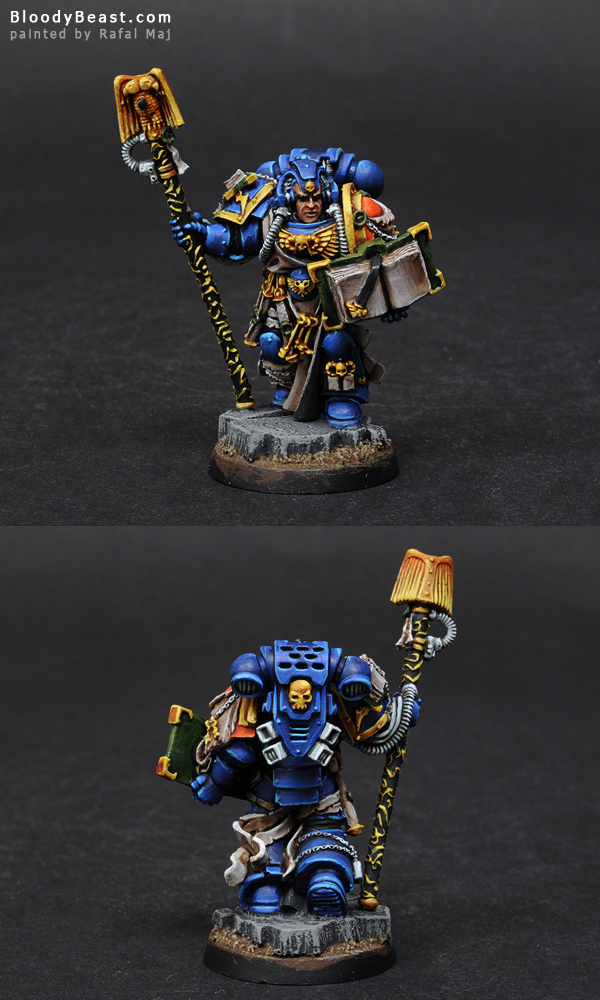
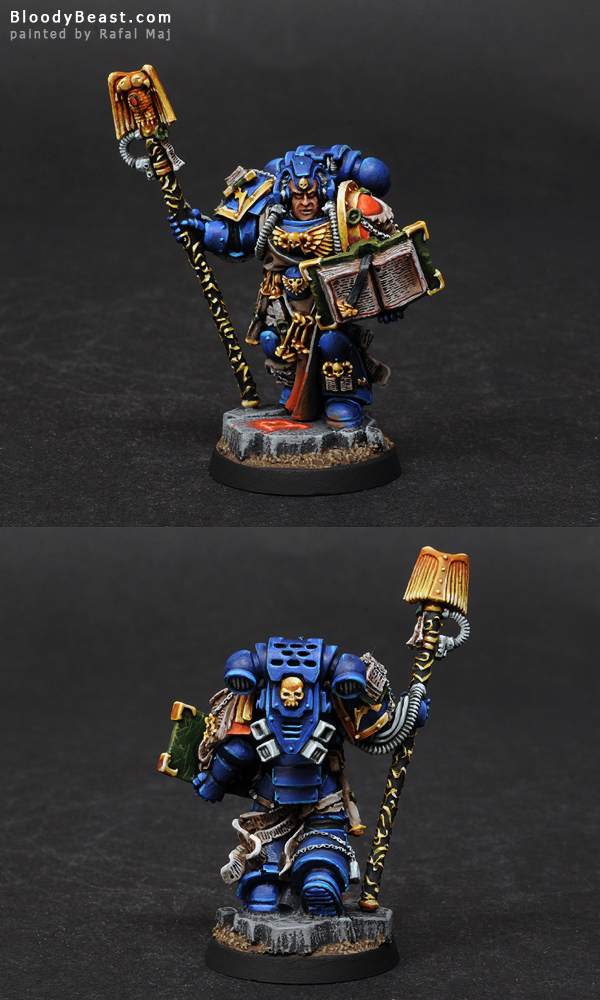
My first tutorial! This would be Space Marines Librarian I did recently. The guy is supposed to be Astral Tiger, but since he is in Librarian Armor this has no impact on painting this mini. So let’s get to it. Oh one more thing. GW stand for Citadel paints, VMC is Vallejo Model Color, and VGC is for Vallejo Game Color. I’m working on video recording, so hope next tutorials would have some videos so you can see how I actually put paint on minis. But let’s start with photos.
Mój pierwszy poradnik! Będzie to Kronikarz Kosmicznych Marines, którego niedawno pomalowałem. Ten kolo jest z zakonu Astral Tigerów, ale poniważ nosi zbroję Kronikarza, nie ma to dużego wpływu na jego malowanie. Zatem zaniczmy. Jeszcze jedna rzecz. GW oznacza farby Citadel, VMC to Vallejo Model Color, a VGC to Vallejo Game Color. Pracuję też na filmikami, żebyście widzieli jak dokładnie nakładam farbę na figurki. Ale zacznijmy od poradnika ze zdjęciami.
Skin (Skóra)
I’ve used GW Talaran Flesh for base tone. Then I put GW Reikland Fleshshade wash on whole face. Next I’ve highlighted with GW Talaran Flesh. Final highlight was done using GW Elf Flesh.
Użyłem GW Talaran Flesh jako bazowego koloru dla skóry. Potem położyłem GW Reikland Fleshshade na calą twarz. Rozjaśnienie zorbiłem znowu GW Talaran Flesh. Końcowe rozjaśnienie wykonałem GW Elf Flesh highlight.
Armor (Pancerz)
Painting Space Marines armor is quite easy but it take’s lot’s of time. For base color I’ve used GW Mordian Blue. Then It was washed with GW Drakenhof Nightshade. Than I was gently highlighting it with GW Ultramarines Blue. This stage took me the most time. You need to make smooth transitions between this color and the shaded mordian blue. So realax and take it slow. The final highlight was done with GW Lightning Blue. I put it only on edges and bolts. All soft metal parts were painted with VGM Heavy Charcoal. Then wahed with GW Oil Nuln and highlighted with GW Adeptus Battlegray.
Malowanie pancerza Space Marines jest całkiem proste, ale dość czasochłonne. NA bazowy kolor użyłem GW Mordian Blue. Potem przyciemniłem go GW Drakenhof Nightshade. Potem delikatnie rozjaśniłem go GW Ultramarines Blue. Ten etap zabiera najwięcej czasu. Trzeba zorbić bardzo głedkie przejscue miedzy tym kolorem a przyciemnionym mordian blue. Więć wyluzujcie się i spokojnie zabierzcie się do tego. Ostatnie rozjaśnienie jest zrobione GW Lightning Blue. Położyłem go tylko na krawędzie i nity. Wszystkie elementy miękkiego pancerza zostały pomalowane VGM Heavy Charcoal. Potem przyciemnione GW Oil Nuln i rozjaśnione używając GW Adeptus Battlegray.
Golden Areas (Złote elementy)
Lot’s of people asked me how I make that gold on minis. Here’s a brief guide. I’ll make longer one with videos someday. I start with base color of GW Trausept Ochre. Then I wash with GW Seraphim Sepia and/or GW Reikland Fleshshade. For this one I used both. First Sepia then Fleshshade. Then I highlighted those areas with GW Bubonic Brown. Next were highlights with mix of GW Bubonic Brown and VMC Pale Sand. For final highlight I used pure VMC Pale Sand.
Dużo osób pytało mnie jak maluje złoto. To jest streszczenie tego procesu. Kiedyś wrzucę wersję z filmikiem. Zaczynam od nałożenia GW Trausept Ochre. Później zalewam go GW Seraphim Sepia lub/i GW Reikland Fleshshade. W tym przykładzie użyłem obu kolorów. Najpierw Sepię potem Fleshshade. Następnie rozjaśniłem te elementy używając GW Bubonic Brown. Potem kolejne rozjaśnienia mieszanką GW Bubonic Brown oraz VMC Pale Sand. Na koniec użyłem czystego VMC Pale Sand.
Cables, Chains, and Backpack Exhausts (Kable, łańcuchy i wydechy plecaka)
Base of GW Astronomican Gray. Than GW Nuln Oil. And than GW Astronomican Gray highlight. Final highlight with white.
Podstawa to GW Astronomican Gray. Potem GW Nuln Oil. Później rozjaśnienie GW Astronomican Gray. Na koniec rozjaśnienie białym.
Robes, Books, Scrolls, and Purity Seals (Szaty, ksiązki, zwoje i pieczęcie czystości)
Base color is GW Rakarth Flesh. Wash of GW Agrax Earthshade. I than highlighted it again with GW Rakarth Flesh and than mix of GW Rakarth Flesh and some white. Writhing were done with black paint. Green seals and book cover were pained with GW Knarlock Green. Washed with GW Coelia Greenshade. And highlighted with GW Knarlock Green and GW Gretchin Green.
Podstawowy kolor to GW Rakarth Flesh. Przyciemnienie GW Agrax Earthshade. Potem rozjaśniłem używając jeszcze raz GW Rakarth Flesh oraz mieszanki GW Rakarth Flesh z odrobiną białego. Napisy wykonałem czarną farbą. Zielone pieczęcie zostały pomalowane GW Knarlock Green. Przyciemnione GW Coelia Greenshade. Oraz rozjaśnione GW Knarlock Green i GW Gretchin Green.
Details (Detale)
Eyes were painted with GW Blazing Orange and than highlighted with adding some white. Same colors for glowing rune on the base. Gem was painted with black and slowly highlighted from dark red to orange. Shoulder pad was also painted with GW Blazing Orange and highlighted adding dark yellow.
Oczy pomalowałem GW Blazing Orange i rozjaśniłem je kilka razy dodając białego. Tak samo pomalowałem świecący run na podstawce. Gemy zostały pomalowane na czarno i powoli rozjaśniane od ciemnego czerwonego do pomarńczowego. Narazmiennik to także GW Blazing Orange rozjaśniany ciemnym zółtym.
Base (Podstawka)
Stone was painted with dark gray and drybrushed with medium grays and light gray. Those are custom mixes I make form white and black paints. So I don’t know proportions. Same for brown parts of the base.
Kamień został pomalowany ciemnym szarym i potem suchym pędzlem nałożyłem średni szary i jasny szary. To są mieszanki które sam robie z białej i czarnej farby. Wiec nie podam Wam dokładnie proporcji. To sam tyczy sie brązowego kolory na podstawce.
Ending (Słowo na koniec)
Hope you like this type of tutorials. I can post more as this is quite easy to make photos at the end of each stages. The bad thing is that it slows my work a bit. I usually don’t paint stage by stage like here. My painting is very chaotic and sometimes I finish some parts before even starting others. But I think I could do this from time to time. Hope to figure out that video tutorials soon. Also just wanted to mention that this Power Armor color works prefect for Ultramarines.
Mam nadzieję, że podoba się Wam mój pierwszy poradnik. Mogę wrzucać ich więcej, jako, że robienie zdjęć pod koniec każdego kroku jest dość proste. Niestety to trochę opóźnia moją pracę. Zazwyczaj nie maluję tak jak tutaj. Moje malowanie jest bardzo chaotyczne i czasem kończe jedne elementy zanim wogólę zacznę malować inne. Ale od czasu do czasu mogę takie poradniki wrzucać. Mam nadzieję, że uda mi się ustawić filmowe tutoriale juz wkrótce. Jeszcze tylko dodam, że te kolory pancerza świetnie spisują sie do malowania zakonu Ultramarines.


Lovely step by step. I can’t believe how good your results are with such a simple palette!
Beautiful job again my friend!!! I’m waiting from the mini here! I believe that my minis will arrive here in Brazil next week. Thanx again.
Did you saw my message on the Facebook? About the Veteran Sergeant?